How Can I Make My Headlights Crystal Clear Again?
24 January 2026
by Conpex
Reading volume: 528
Over time, even well-maintained cars start to show cloudy or yellow headlights.
This isn’t dirt—it’s oxidation. Constant UV exposure breaks down the factory protective coating on the plastic lens, leaving it dull, hazy, and less transparent.
Beyond looks, this affects safety. Cloudy headlights can significantly reduce nighttime visibility.
The good news? With the right method, you can restore that crystal-clear finish at home—and it’s one of the most satisfying DIY jobs you can do on a weekend.
The “Quick Fix”: The Toothpaste Method
You’ve probably heard of the toothpaste headlight hack. It actually works—but only in limited situations.
Why toothpaste helps
Toothpaste contains mild abrasives designed to polish enamel. When rubbed onto headlights, those abrasives can remove a thin layer of surface oxidation.
How to try it
Wash and dry the headlights.
Apply white (non-gel) toothpaste to a microfiber cloth.
Rub firmly in circular motions for 3–5 minutes.
Rinse and wipe clean.
The limitation
This method only helps very light cloudiness. It does not remove deep oxidation and offers no UV protection, meaning the haze often returns within days or weeks.
Think of it as a temporary cosmetic touch-up—not true headlight restoration DIY.
The Pro Approach: Deep Headlight Restoration
If your headlights are heavily fogged or yellow, proper restoration is the only lasting solution.This process removes oxidation completely and restores clarity.
Step 1: Prep and Masking
Before you start, protect your paint.
You’ll need:
Painter’s tape
Car wash soap
Microfiber towels
Clean the headlights thoroughly, then apply painter’s tape around the edges. This prevents accidental scratching during sanding and polishing.
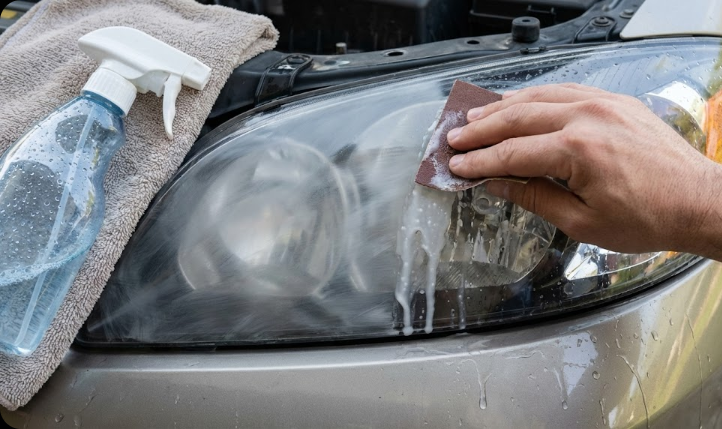
Step 2: Wet Sanding (The Most Important Step)
This step removes the damaged oxidized layer.
Tools:
Wet sandpaper (1000, 2000, and 3000 grit)
Spray bottle with water
Process:
Start with 1000 grit to remove heavy oxidation. Keep the surface wet at all times.
Sand in straight, even strokes. The lens will look worse at first—this is normal.
Move to 2000 grit, then 3000 grit, refining the surface each time.
This step is the key to removing oxidation from headlights properly.
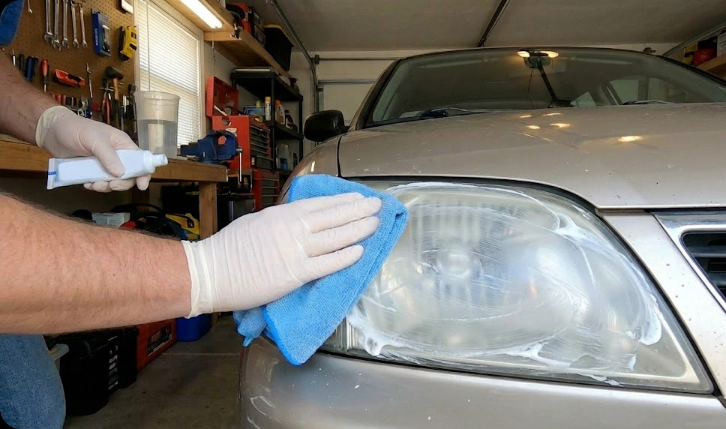
Step 3: Polishing for Clarity
After sanding, the lens will appear dull but smooth.
Apply a rubbing compound or plastic polish using:
A microfiber cloth, or
A dual-action polisher (optional)
Buff until the lens becomes clear again. This restores transparency and brings back that glass-like appearance.
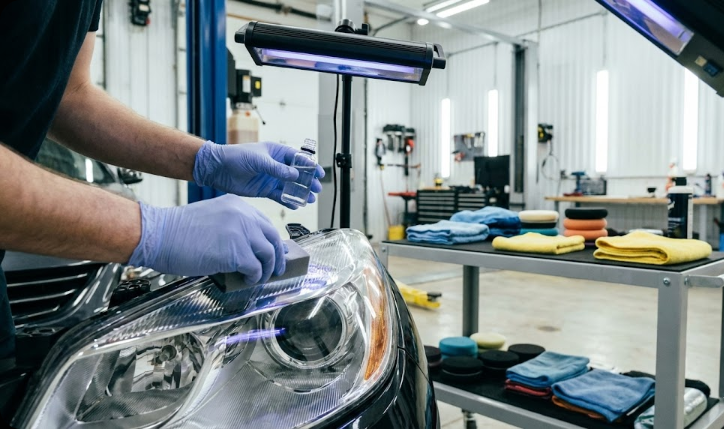
Step 4: Apply a UV Sealant (Critical Step)
Many DIY restorations fail here.
Without protection, oxidation will return quickly.
Apply a headlight UV sealant or clear-coat spray designed specifically for plastic lenses. This replaces the factory UV layer and can keep headlights clear for 6–12 months or longer.
Skipping this step often means yellowing returns within weeks.
When You Should Replace Instead of Restore
Restoration works only on surface damage. It cannot fix structural problems.
You should consider replacement if you notice:
Moisture or fog inside the headlight housing
Cracks in the lens
Severe pitting from road debris
Delamination of the plastic
In these cases, polishing the outside won’t restore proper light output.
Final Thoughts
If you’ve been wondering how to restore cloudy headlights, the process is absolutely doable at home with patience and the right materials.
Whether you try a quick fix or a full restoration, remember this:
Clear headlights aren’t just cosmetic—they directly improve nighttime safety.
Set aside a couple of hours, take your time, and enjoy the moment when your headlights look brand new again.


